How to Fix System Date and Time Resetting to 2000-01-01
Device Model: FirstFiber Technologies 8000MAX Optical Time Domain Reflectometer (OTDR)
Issue: The system date and time automatically reset to 2000-01-01 00:00:00 upon every power startup.
Cause: Depleted Real-Time Clock (RTC) coin cell battery (approximate service life: 5 years).
Solution: Replace the internal RTC coin cell battery.
Overview
Thank you for choosing the FirstFiber Technologies 8000MAX OTDR.
The internal Real-Time Clock (RTC) of the 8000MAX operates on a dedicated coin cell battery rather than the primary device battery. After approximately 5 years of regular use, this coin cell battery will run out of charge. When this depletion occurs, the device resets its system date and time to 2000-01-01 00:00:00 each time the unit boots up.
FirstFiber Technologies recommends contacting your authorized equipment distributor or the FirstFiber Technical Support Team for factory servicing. Users with electronics maintenance experience may replace the battery independently by following the step-by-step instructions below.
Required Tools
- Precision Phillips-head screwdriver
- Non-conductive plastic pry tool (insulated spudger)
- Replacement RTC coin cell battery model CR1220 3V
Step-by-Step Replacement Procedure
Step 1: Remove the outer housing screws
Use the precision screwdriver to unscrew and remove all fastening screws from the rear casing.
Step 2: Separate the housing and disconnect the two primary battery packs
Carefully pull the front and rear casings apart. Using a long, non-conductive plastic pry tool, gently lift and disconnect the battery cable plugs from the printed circuit board (PCB).
Notice: The 8000MAX contains two separate battery packs—one on the left side and one on the right side. You must disconnect the cable plugs for both batteries before proceeding.
Step 3: Disconnect the display screen ribbon cable
Locate the flexible flat ribbon cable that links the motherboard to the display screen. Use a flat plastic pry tool to release the cable locking latch, then slide the ribbon cable out. Do not apply excessive force, as severe mechanical stress can break the connector latch.
Step 4: Remove the circuit board mounting screws
Unscrew and remove the internal screws securing the main circuit board to the internal chassis.
Step 5: Access the RTC battery socket
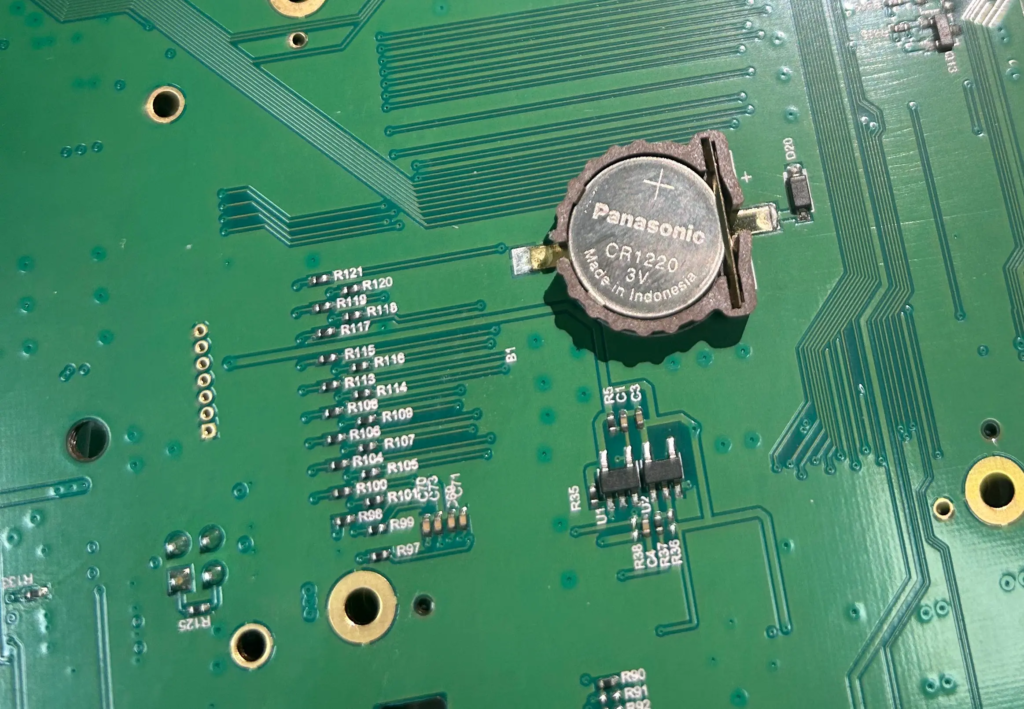
Gently lift the circuit board out and turn it over. The RTC coin cell battery socket is mounted on the reverse side of the board.
Step 6: Replace the coin cell battery and reassemble the OTDR
Locate the metal retaining clip on the edge of the battery socket. Gently press this metal clip outward to eject the depleted battery. Insert the new coin cell battery with the positive side (+ marking) facing upward until it firmly snaps into place. Reassemble the OTDR by executing the disassembly steps in reverse order.
Step 7: Verify system time settings
Turn on the 8000MAX OTDR, open the system configuration menu, and set the current date and time. Turn off the device and power it back on to confirm that the time settings remain saved.
The following instructional video is provided for your reference.
Visit the link for 8000MAX OTDR Specifications.